Casing Wear Series - 4: Interpreting Casing Wear Test Data

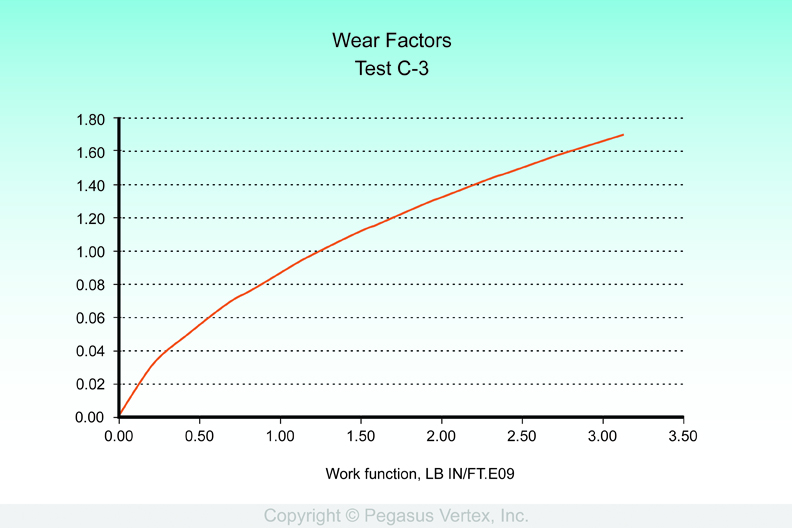
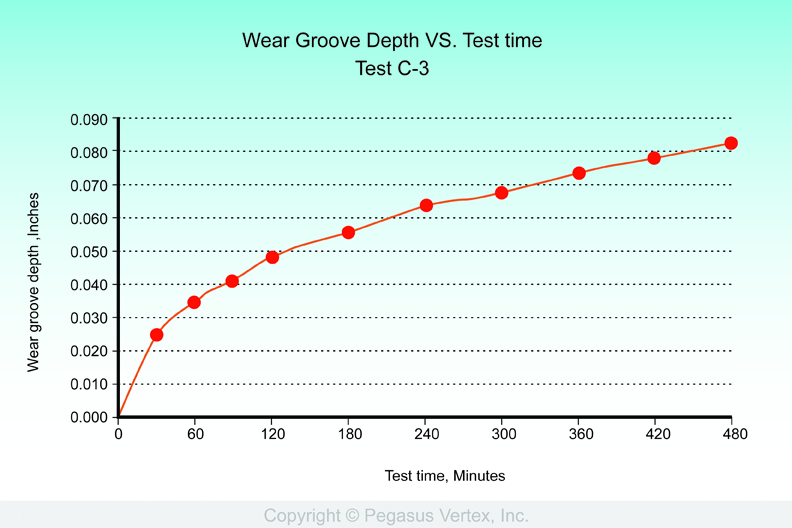
Casing wear test data consists of a series of wear groove depths and the elapsed test times at which they were obtained. A data set from one such test is pictured in Figure 1.

Wear groove depth VS Elapsed test time

Figure 1: Wear groove depth VS Elapsed test time

Since it is desired to use these test results to predict the performance of casing wear systems with dimensions other than those used in the laboratory test (Different casing ID and tool joint dimensions), a model which is independent of the casing and tool joint dimensions was needed. Such a model was proposed by Dr. W. C. Maurer. His model was: The casing wear groove volume per unit length of casing is proportional to the work done per unit length on the casing by the tool joint. The constant of proportionality, called `Wear Factor’, was to be evaluated at the end of the 8 hour casing wear test, as shown in Figure 2.

Casing Wear Groove Volume VS Work Done by Tool Joint

Figure 2: Casing wear groove volume VS Work done by tool joint

Here, the performance of the casing wear system is characterized by a single number - the wear factor. This describes the performance of the casing wear system (consisting of casing, tool joint, and drilling fluid ) as linear. Obviously, this is not the case.  But, the linear model greatly simplified the development of a mathematical procedure to predict the wear performance of a wear system in the field. This was the basis for several casing wear mathematical programs which are quite successful in predicting the casing wear to be expected in field drilling operations today. The difference between predictions based on the linear wear performance system and the real world non linear system is, in many cases, less than the uncertainty of wear data obtained in the field. Casing wear logs are costly and time consuming, and are not usually run on a routine basis.

CWPRO is a modern upgraded and improved descendent of these earlier casing wear programs.

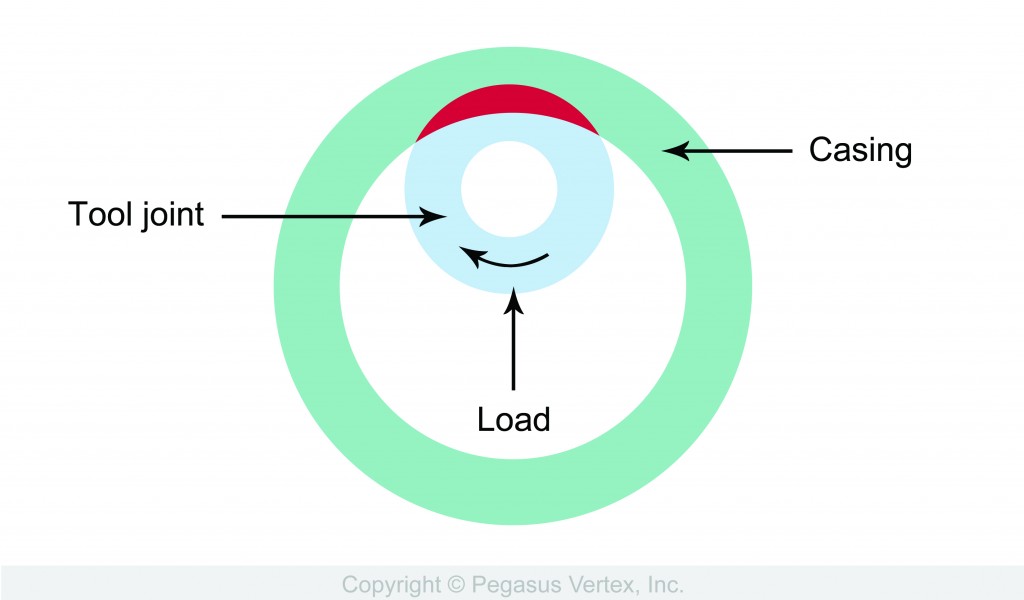
Casing wear groove geometry

Figure 3: Casing wear groove geometry

Conversion from casing wear test data, ‘groove depth vs. elapsed time’, to ‘groove volume vs. frictional work’ is a straightforward mathematical operation based on the wear groove geometry shown in Figure 3.

From ‘groove volume vs. frictional work’ back to a ‘casing wear groove depth vs. rotating time’ is similarly straightforward, regardless of the geometry in the field operations.

Knowing the value of the wear factor, and applying the concept that casing wear groove volume is a universal function of frictional work done by the tool joint on the casing, allows us to convert from wear groove volume to wear groove depth for any combination of casing internal diameter and tool joint outside diameter.  When applying the wear model to field drilling operations, the frictional work done by the tool joint on the casing is first determined. Applying the mathematical model to this information, allows the casing wear groove volume to be determined. Knowing the wear volume, and the inside diameter of the casing and the outside diameter of the tool joint (see Figure 3) we have all the information needed to determine the depth of the casing wear groove.

When the complete description of the wear system performance is needed, the differential wear factor shown in Figure 4 is used. The differential wear factor is the slope (derivative) of the wear groove volume vs. work function curve.

Differential wear factor

Figure 4: Differential wear factor

Casing Wear Series - 2: The Basics

When it became apparent that casing wear was going to be a matter to be reckoned with, several organizations initiated experimental studies of this phenomenon. Among these were (1) Shell Oil Company, (2) Exxon, (3) Texas A & M, and (4) Drilco. All these operators discovered that experimental casing wear studies were both time consuming and expensive.

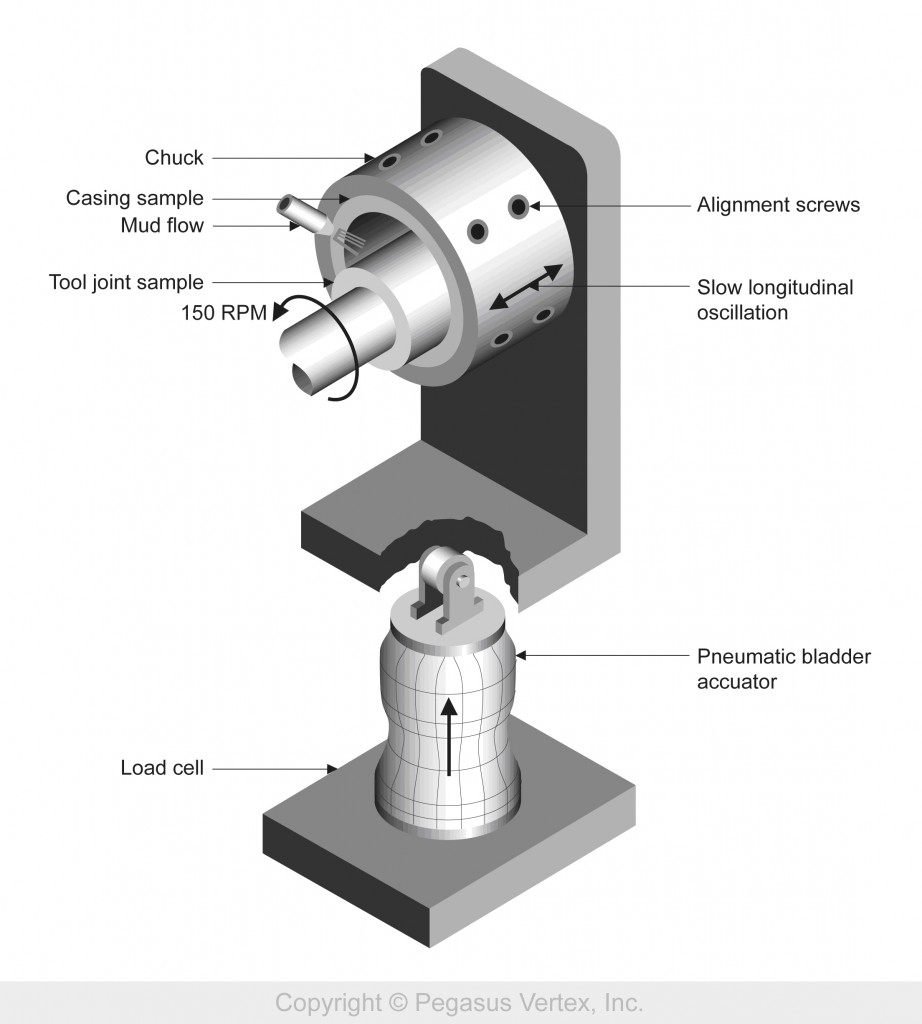
All of the casings wear studies involved building a machine that would simulate field conditions as closely as possible in the laboratory. Figure 1 is a symbolic presentation of a casing wear test machine that incorporates all of the parameters needed to simulate casing wear as it would occur under field conditions.

Elements-of-a-casing-wear-test-machine

Figure 1: Elements-of-a-casing-wear-test-machine

As shown in the Figure 1, the rotating tool joint sample is pressed against the inner wall of the casing sample with a constant force. The intersection of the casing and the tool joint is flooded with drilling fluid, which contains sand to simulate the drill cuttings which the mud transports to the surface in field operations.

In addition, the tool joint ( or the casing sample ) should be slowly reciprocated during the wear test to simulate drilling progress. Failure to include this reciprocation results in a significant reduction in the observed casing wear. It is believed that without reciprocation, the casing sample and the tool joint sample will `mate’ to each other, and the drilling fluid will then form a hydrodynamic lubricating layer between the two surfaces. This will greatly reduce the grinding effectiveness of the sand that is transported by the drilling fluid. Non-reciprocating wear tests may result in as little as 10% of the wear observed in tests where reciprocation is employed.

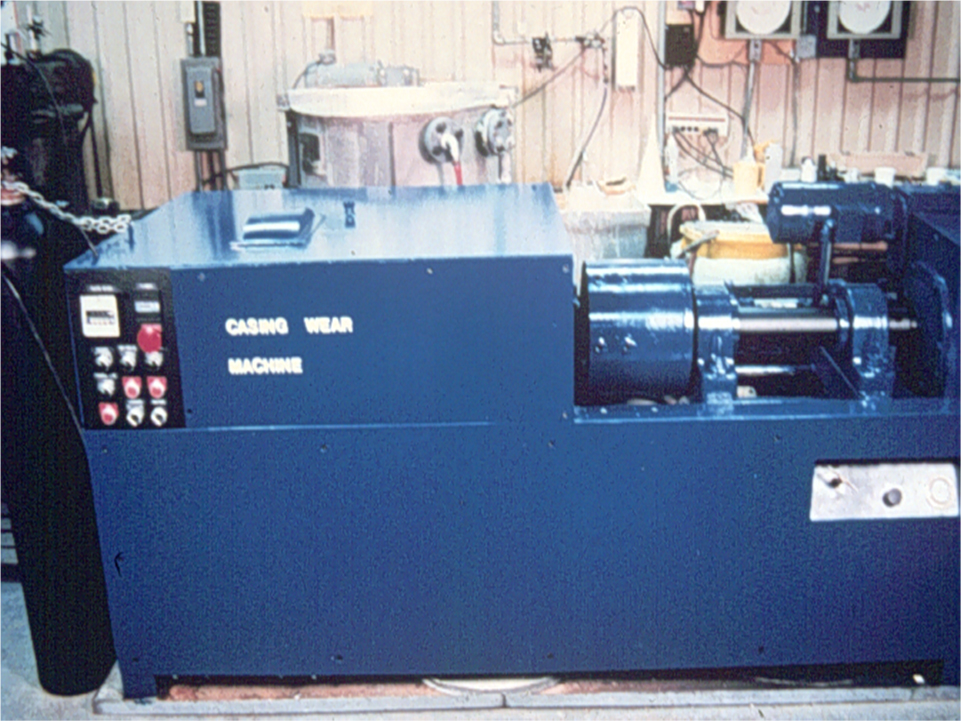
Such a casing wear test machine is pictured in Figure 2. This machine was built by Steve Williamson ( Drilco ) in the early 1980s, and was later purchased by Maurer Engineering for use in the Drilling Engineering Association ( DEA ) projects ( DEA – 8, DEA – 42, and DEA – 137 ). These projects covered the period from 1990 through 2002.

Drilco casing wear test machine

Figure 2: Drilco casing wear test machine

Most of the material presented in these articles was developed as a result of the work done using this machine.

Torque and Drag - Nuts and Bolts

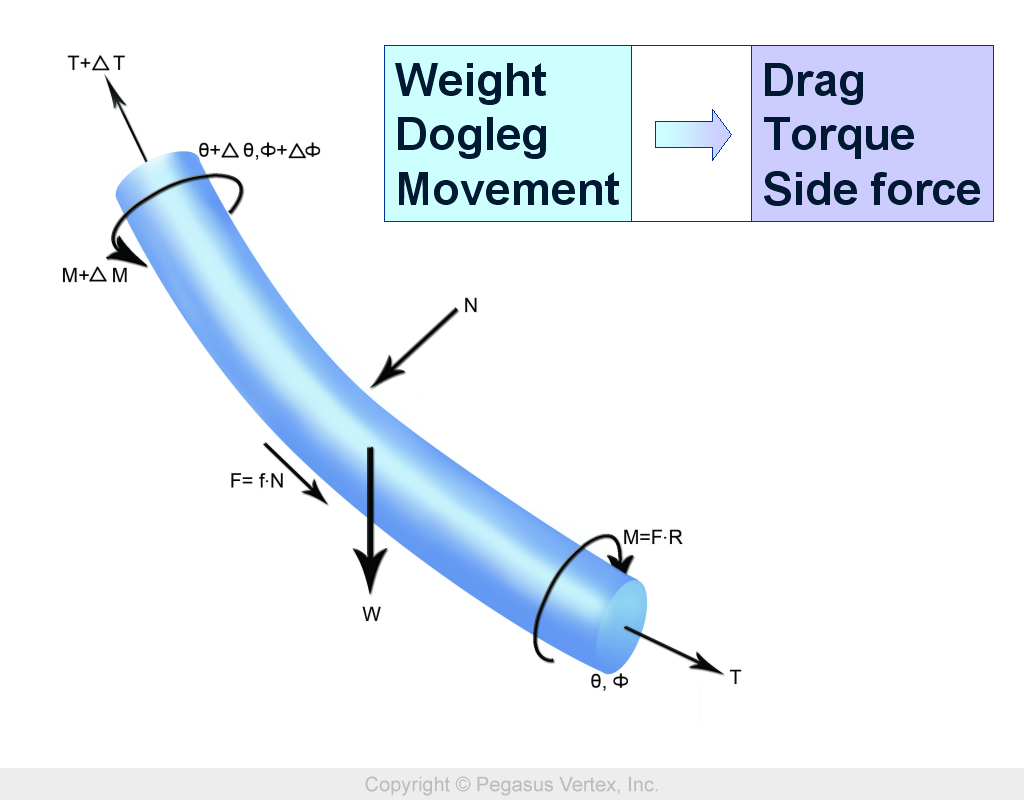
No matter it is an operation of drilling or casing running; any pipe movement in the deviated wellbore produces torque and drag (T&D) along the pipe. T&D is our weapon to drill a well or run a casing to the bottom. However, excessive T&D will cause equipment and operation failure.

Basically, axial movements such as drilling ahead or tripping creates drag, while rotation produces torque. The magnitude of T&D is determined by the combination of these two movements. Rotation shifts the resistance from drag to torque. In other words, you can shift the drag to torque by rotating the pipe. That is why people tend to rotate the pipe little bit if pipe gets stuck.

Torque and Drag Calculation

Typical T&D analysis starts by dividing the pipe into small elements. Calculation begins from the element at the bottom of the pipe, where weight on bit (WOB) or torque on bit (TOB) is expected. For each element, force and torque are balanced and the T&D at the top of the element are calculated step by step and from bottom to top, calculation is performed for each pipe element, until it reaches the rig floor. We call the torque and drag at the top of pipe surface torque and hook load (with block weight), respectively.

Torque and drag calculationTorque and Drag Common Terms

Some terms often used in torque and drag analysis are listed here with explanations:

  • Friction Factor (F.F.) - the representation of the friction between the wellbore/casing and the work string. The friction factor is dependent on mud type, pipe and wellbore and cutting concentration. Higher cutting concentration leads to higher friction factor.
  • Rotating Off Bottom (ROffB) – pipe rotates without any axial movement, such as rate of penetration or tripping. There is no WOB or TOB because bit is not engaged with formation.
  • Rotating On Bottom (ROnB) – pipe rotates without any axial movement, such as rate of penetration or tripping. However, WOB and TOB are present because bit is engaged with formation.
  • Drilling – pipe rotates with certain rate of penetration and with the presence of WOB and TOB.
  • Slide Drilling - Drilling with no drill string rotation. (only axial movement, no rotation)
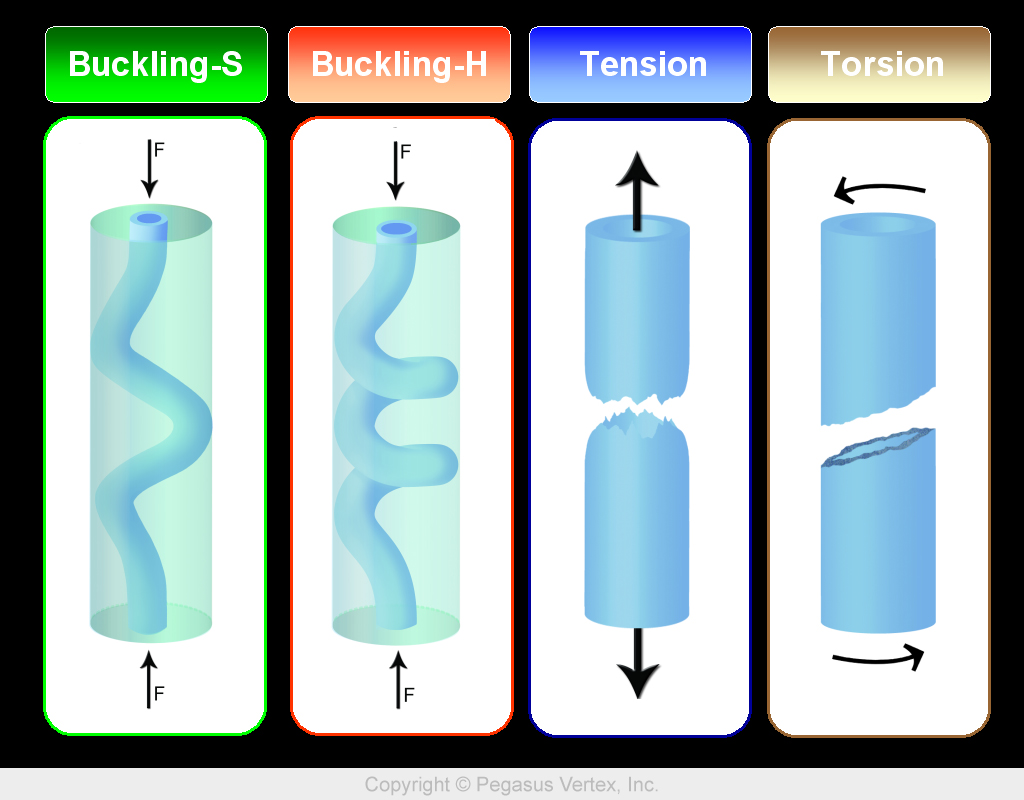
  • Sinusoidal Buckling - Sinusoidal buckling occurs when compressive forces on the string become too high, resulting in a snake-like bending in the string. Note that in this mode, the pipe deforms, but still in a 2D plan.
  • Helical Buckling - a more extreme form of buckling which occurs when compressive forces pass through sinusoidal buckling and exceed the helical buckling limit. Helical buckling causes contact between the pipe and the wellbore, exerting force on the wall of the hole. Both drill string fatigue and interference with weight transfer to the bit occur. Helical buckling should be avoided.
  • Helical Lockup - Helical lockup occurs when compressive forces on a string in helical buckling prevent axial movement. Forces at surface are not transmitted to the bit.
  • Tension Limit- The tension limit of a material is based on its yield strength, which is measured in psi. When the minimum yield strength is exceeded, pipe will plastically deform. Plastic deformation occurs when pipe that has stretched does not return to its original shape.
  • Make Up Torque- The rotational force used to make up a connection in the string. Drill pipe failure may occur when the make-up torque of a connection is exceeded.Buckling-Tension-Torsion
  • Stress in the String - The various stress that TADPRO models are axial, bending, torsional, and shear stresses. These stresses are summed up in the Von Mises Stress. Various failures occur as a result of repeated stress to a string, including cracking, washouts, and twist offs, etc.
  • Stress in the String - The various stress that TADPRO models are axial, bending, torsional, and shear stresses. These stresses are summed up in the Von Mises Stress. Various failures occur as a result of repeated stress to a string, including cracking, washouts, and twist offs, etc.
  •  Casing Wear- Prolonged, repeated axial and rotational movement within casing will wear both at the string and the casing, potentially leading to string and casing failure.Casing wear

Casing Wear Series - 1: How we got here?

Prologue

Mr. Gefei Liu, president of Pegasus Vertex, Inc. (PVI), suggested that I write a series of short articles to discuss the empirical science of casing and riser wear. PVI incorporates this technology in their computer program – ‘CWPRO’. This program applies wear technology to predict casing and riser wear to be expected during drilling operations.

The observations and opinions expressed in these articles are based on my 20-year association with the subject of casing and riser wear. Much of this time was spent at Maurer Engineering, under the direction of Dr. W. C. Maurer. Much of the advances in the subject were the direct result of Dr. Maurer’s phenomenal knowledge of and insight into the technical challenges that were encountered during the development and application of casing and riser wear technology.

In the beginning

Casing wear was not recognized as a problem until the early 1960s. Vertical wells were being drilled deeper, and directional wells were being pushed out further. This required longer drilling times, and resulted in much greater exposure of the inner wall of the intermediate casing to the rotating tool joints of the drill string. Wear grooves appeared in the intermediate casing and progressed from noticeable to serious.

Up to this time, tool joint wear was the only wear problem being treated.

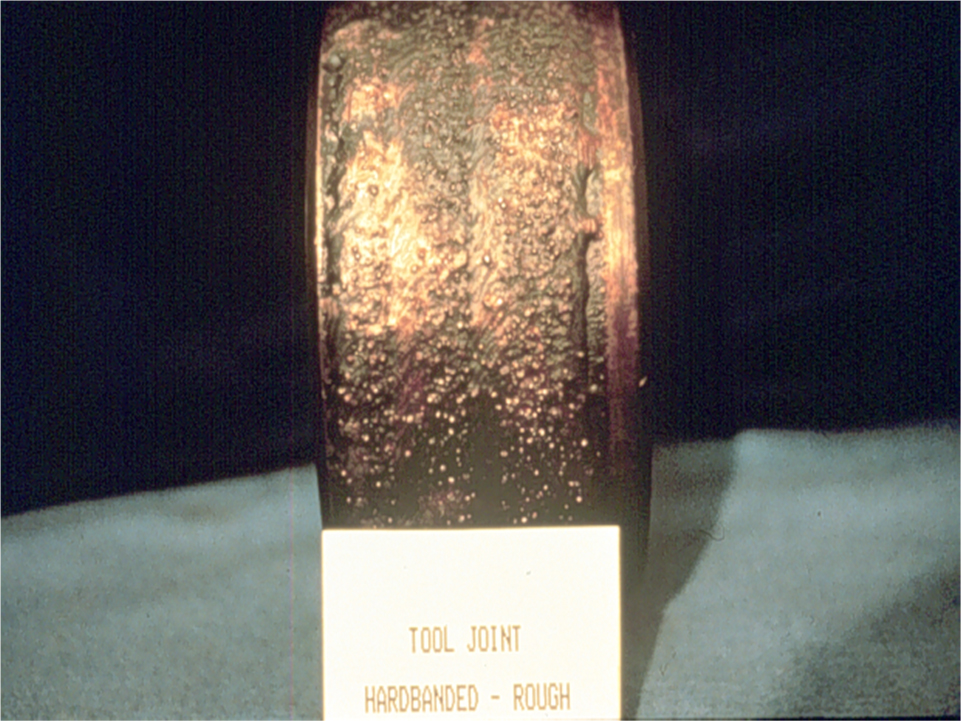
The universally accepted treatment to prevent tool joint wear was to coat the tool joints with an alloy containing tungsten carbide particles. This protected the tool joints, but was proving to be a bit hard on the intermediate casings.

Tungsten carbide coated tool joint (Field Applied)

Figure 1: Tungsten carbide coated tool joint (Field Applied)

The tungsten carbide coated tool joints were efficiently machining wear grooves into the inner walls of the intermediate casings. As these wear grooves deepened, they would seriously reduce the pressure capacities (burst & collapse), sometimes resulting in catastrophic failure.

Pressure test of worn casing

Figure 2: Pressure test of worn casing

These early findings resulted in the establishment of two distinct, but related, developments.

1. Experimental studies of casing wear; and

2. The development of casing-friendly tool joint coatings that would also protect the tool joints.

First of all, what are the basic elements of casing wear?

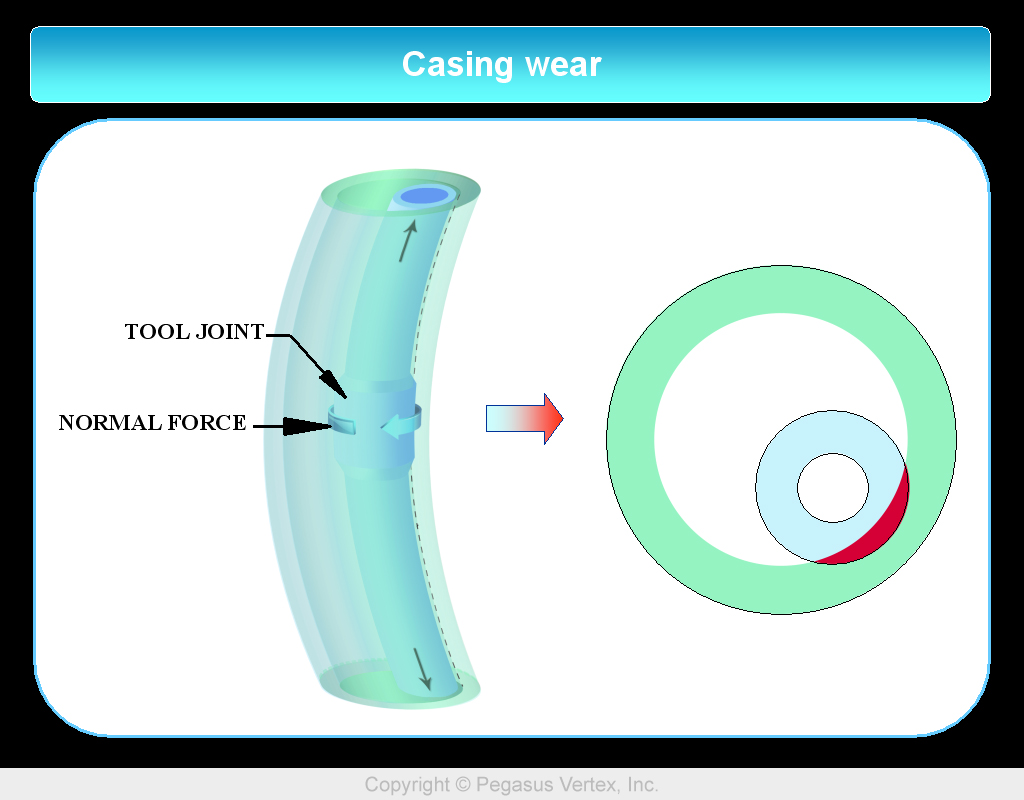
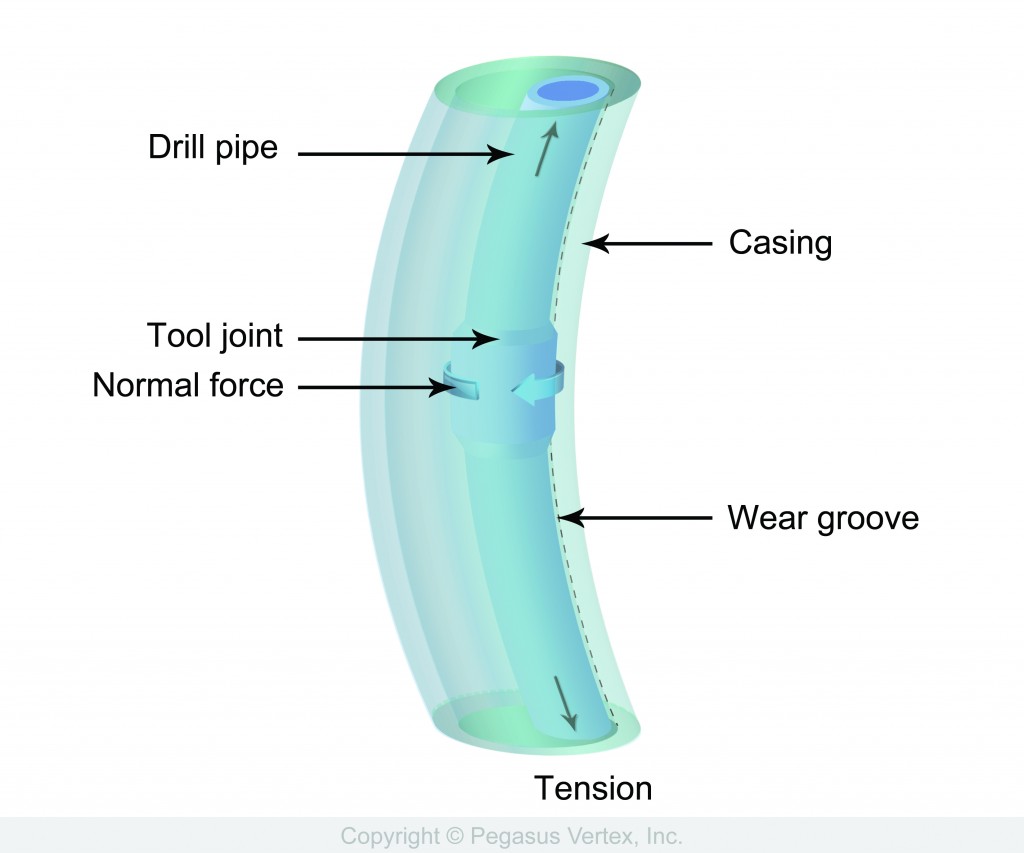
If boreholes were straight, casing wear would be much less of a problem. But, boreholes are not straight. As shown in Figure 3, tension in the drillstring pulls the rotating tool joints into the convex sides of the curved borehole. Since the tension in the drillstring may be several hundred thousand pounds force, the lateral loads forcing the tool joints into the convex wall of the intermediate casing may be several thousands of pounds force. The greater the curvature of the borehole, measured as `dogleg severity’, the greater will be the lateral load pushing the drill string into the intermediate casing wall. ‘Dogleg Severity (DLS)’, which is measured in degrees per 100 feet, can run as high as 5 deg/100 ft. or worse.

Drilling fluid which transports drill cuttings to the surface, flows past the tool joint/casing contact, and provides the abrasive needed to grind a wear groove into the inner wall of the intermediate casing.

Casing wear at a dogleg is shown in Figure 3, and a schematic of the resulting casing wear groove is shown in Figure 4.

The existence of the casing wear grooves indicates that there are many locations where epicyclic drillstring vibrations do not occur.

Elements of casing wear

Figure 3: Elements of casing wear

Casing wear groove

Figure 4: Casing wear groove